
1. What is version control and why we need
version controls?
-
Version controls are managing the changes on
document or files which you are working throughout the application.
-
Whenever you are doing the check-in of your
application it will create the snapshots of application and create the version
for your files or folders that you worked.
-
You can go back and forth to the different
version.
2. Why do we need of version controls?
-
It uses for collaboration
everyone is working on the different task than through version controls all the code can combined together.
-
Version controls are shared work space where any one can access the fill latest code.
-
Avoid
Conflict if two or more user working on same task.
-
It helps to track
the work done by whom.
-
It used to store different version of your application.
-
It uses to maintain the backup, if your central server crashes a backup will available on
your local system.
-
It also use to analyze the project that how your application got evolved between
the versions.
3. Version control tools
-
Subversion (SVN): it provide centralized code
controls it don’t provide the local version system.
-
Mercurial: It is similar to Git it is having
distributed versioning system.
-
TFVC & TFS: It is centralized server.
Typically team members have only one version of each file on their dev machine.
-
GIT: it is centralized versioning control. Each
developer has copy of source repository on dev machine. You can maintain the
version controls in local machine and maintain the history of code without
network connection. GIT is open source.
4. Comparison between the usage of versioning
controls popularity.

**PC
: Google
5. Let’s learn about GIT and GIT Hub.
GIT is maintaining the Distributed
repository system, there are local copy of repository system in each developer
local system. And at the top main there
is central repository system its called as GIT HUB. Git hub is the main
repository you can say its centralized code repository provide by GIT . GIt is
using as a local repository their user can work without network connection and
push their code to Central Repository (Git Hub).

**PC :
Euraka
-
Pull – to get the files from GIt hub user need
to use the Pull command once it will get the files user have their own
repository in their local where he can play and maintain their own version.
He/she can do the changes.
-
Commit – this command is use to commit user
local changes to Local repository.
-
Update -
This will use to get the latest code from repository and update the
local code.
-
Push – it will push your local repository
changes to the main(central) repository.
6. Feature of GIT.
-
Distributed:
Every developer has their individual copy in local system. Allow distributed
development of code.
-
Branching
: It takes only few second to create and merge the branch. Master branch having
production code.
-
Non Liner
– it is marinating the version in term of tree structure not like the regular
liner versioning controls like SVN.
-
Lightweight
– Use loss less compression of code in client
side.
-
Speed
– fating data from local repository is 100 time faster than getting the code
from remote repository.
-
Open Source:
You can modify your source code according to need.
-
Secure
: Uses SHA1 to name and identity objects. Every file has check in with checked
sum and file will pulled by checked sum number.
-
Economical
: Released in GPL license and it is free.
7. Git Operations and Command
-
Creating
a central repository in GIT Hub.
Step 1: create an account in git hub.
Step 2 : Create a new repository.

As you selected Initialize this
repository with readme you can see the read me file.

You can do the changes in readme file
as well. Just click on read me file and do the changes and do the commit

Now here your central repository has
created now you need a client to access that code.
Step3 : You need to install git in
your local machine.
You can install git from.
Once you install the GIT you can
check it by GIT command in command
window. It will give you result like below.

Step 4: Create
Local repository Now just create a folder where you want to create your
local repository the first , you need to go to that folder and just type command
as git init like below.
Now than .git folder will create on
your created folder. Open a git bash on folder (rt click à click on git bash)

-
Sync code with central repository
Step 1: Create the origin of github application
use below command and press enter.

Step 2:
from where you will get the URL which you have given.

Now your origin has been assign
successfully.
Step 3: Now let’s run git pull origin master as
like below to pull the code from centre repository.

Git
Pull = Git fetch + Git Merge
Now see that we have all the file created
or not?
You have readme file get from server.

Step 4: Making changes.
-
If you are doing any changes there is process in
GIt to proceed with that like below.

**Pc : Euraka
Git Status: It will help you to check that what are the
file you added or do changes.
Git
Add : Adding new files into your repository.
GIt
Commit : Finally commit the changes into repository.
Let’s have one example
-
You can see the step by step process of checking
status and adding file.

-
Now you need to does the Commit into local
repository along with that just provide the comments for your commit for future
reference?
$git
commit –m “{comment]
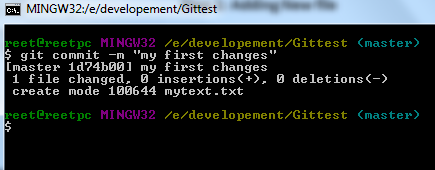
By doing this you are committing your file
to local repository not into centralised server.
-
Use git log to see the operation done on your
repository.

-
PUSH
: Push that file into you master branch than you need to give the command as
$git
push origin master
Once you give that it will ask you a
password like Blow screen.

Once git will authenticate it successfully
it commits your changes to server.

You can add a folder also into GIT.
Just follow the below steps

now you can see it in your repository

Step 4: Parallel development
-
Creating
Branch
-
Branches : Branches are specific pointers
Whatever the code you got it’s called as
the master branch. If you are working
with multiple task that you don’t want to merge at this time than you can
create branches from master branch.

Like in Fig you can create many branches
from Master branch and later you can merge branches.
-
Let’s see how to create branches.
-
From right hand side you can see which branch
you are currently working with.

Use command ::
$git branch [BranchName] to create new branch.
$git branch to see list of
branch and which branch you are currently working
$git
checkout [BranchName] to switch to that branch

Now lets create some files in the branches
and do the commit and then check is that present in another
branches or not.
If you will see we have create b1file.txt and than commit it to b1fist
branch and see the list of file it is present their.
But when we switch to master branch it
won’t present there. [Even from your system disk it won’t present]

Merging
of branches.
Once you create the branch finally you want
to merge the branches all together.
Its way of combining the different work all
together. Allow to branch of you code and develop new feature and combine it.

Let’s see how we can merge the BFist branch
changes to master branch. You should be present to the source branch where you
want to do the merge. [Like you should be in master branch].

Now you can see the file in master branch.
But remember still you have Bfist branch and if you will do any changes you need
to do the merge again.
No comments:
Post a Comment